SCSI2SD Quickstart (Draft)
The following guide is designed to get up and running quickly with a SCSI2SD when you don’t have any installed OS on your antique Macintosh.
The following are required :
- A SCSI2SD board
- The SCSI2SD utility for setting up the board
- A copy of the program Etcher
- An SD card of at least 256MB
- An elderly Macintosh
- A modern computer (MacOS X, Linux or Windows)
- A USB Micro cable
- Time
Note : some cheap charging USB cables don’t bother connecting the data lines. If you can’t connect to your SCSI2SD over USB, try another cable.
Download the following disk image onto your modern computer. This is a “Restore” partition and contains a bootable copy of Mac OS 7.5.3, installation disk images for Mac OS 7.5.3 and some utilities etc. to make life easier.
v1.01 of the Restore and Transfer Image for SCSI2SD (~57MB download)
v1.01 with additional Pre-made Blank User Disk (~327MB download)
Unzip the disk image in the download and save it somewhere handy, such as the desktop.
Install Etcher, insert your SD card into the modern computer (not the SCSI2SD!), launch Etcher and follow instructions to select the downloaded disk image and your target SD card. Take care – you don’t want to flash it to your computer’s hard disk!
Once the card is written, eject it from your modern computer. Place it in the SCSI2SD for safe keeping.
Plug the SCSI2SD into your modern computer using the USB micro cable. Launch the SCSI2SD Utility and enter the following settings…
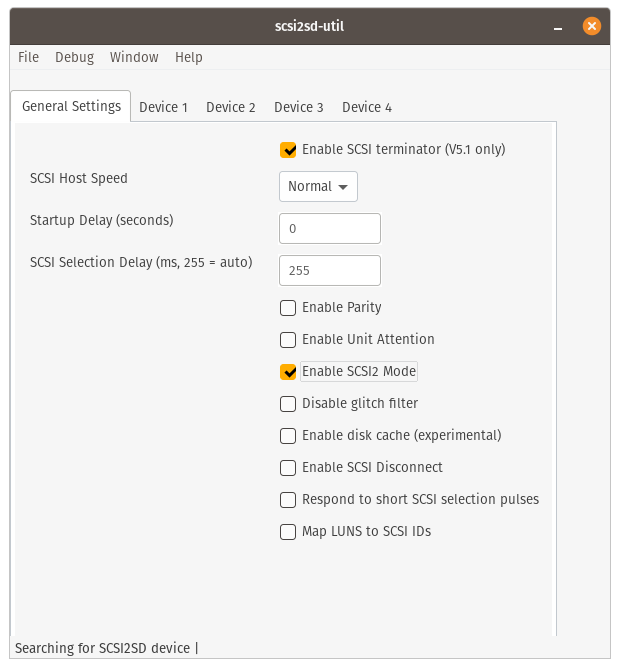
Set the Global Settings – Check Enable SCSI terminator if the SCSI2SD is the only device on the SCSI bus, or if it is the last device on the cable.
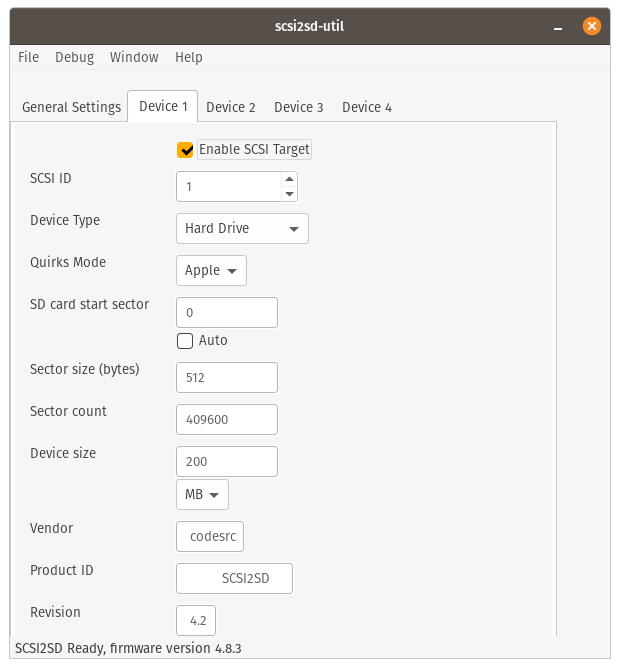
Set up Device 1 – this will be a disk, with two partitions, on SCSI ID 1. This leaves ID 0 free for internal hard disks. Note that Device Type, Start sector, Sector size and Device size (in MB from the menu underneath!) are critical. Other stuff less so.
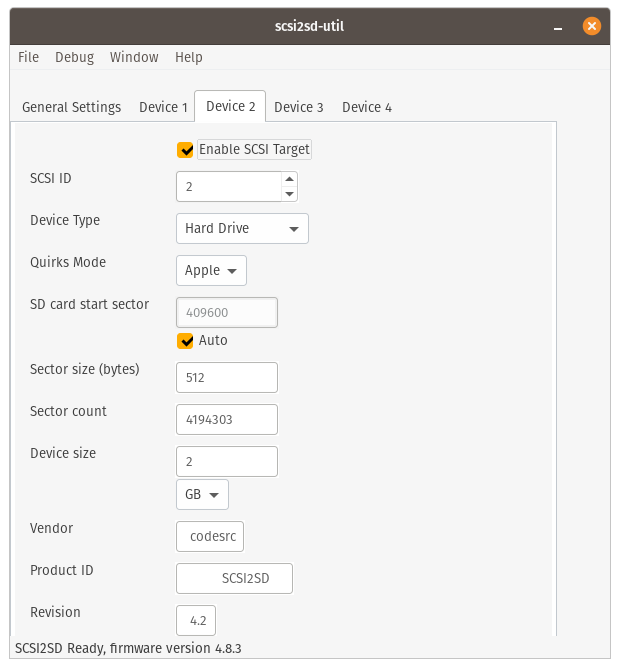
Set up Device 2 as follows. The size is not critical and depends on how much space you have available. I’d recommend no more than 8GB.
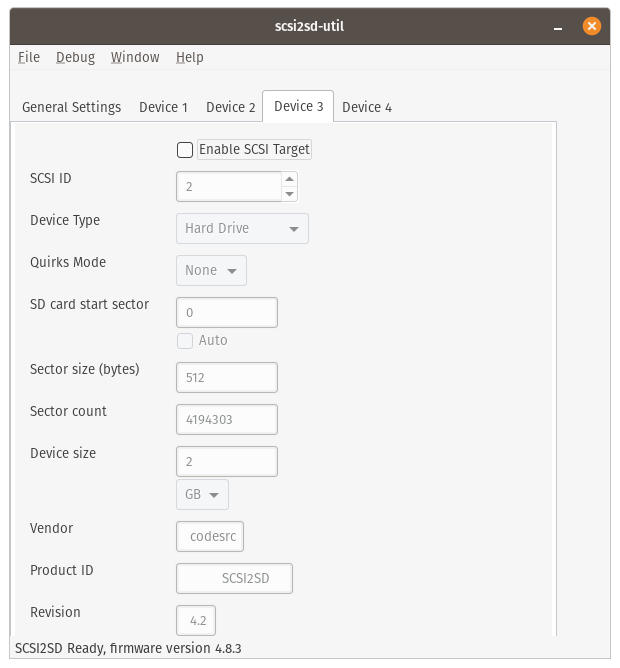
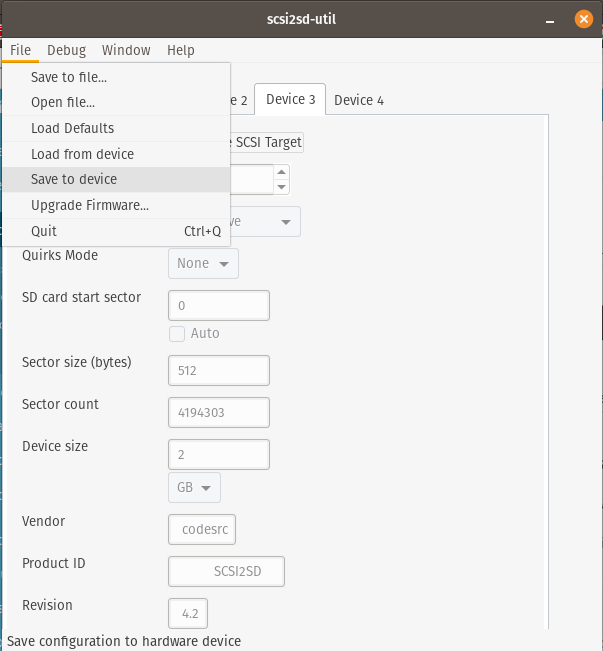
Set up Device 3 and Device 4 as follows – all that needs to be done is to ensure that “Enable SCSI Target” is unchecked for each of these tabs. This renders the remainder irrelevant.
Finally, load the settings into the SCSI2SD by selecting Save to device from the File menu. Once this is done, quit, make sure the SD card is plugged into the SCSI2SD, unplug it and plug it into your geriatric Macintosh. If it is the only disk connected, it should boot from it as long as the Macintosh supports Mac OS 7.5.3… which a lot do.
At this stage, you will need to format the virtual Drive at SCSI ID2 which you created on the “Device 2” tab above if you wish to use it, unless you downloaded the disk image with the pre-made user drive (which will appear as “Macintosh SD”. If you didn’t, you should be able to at least have a little play with the computer as is with the restore disk.
Known Issue…
Note that I have included a 100MB FAT16 partition – with the intention that this can be used to transfer files directly onto your classic Macintosh by inserting the SD card into your modern computer and copying files onto the DOS Transfer partition when it mounts. This doesn’t currently work as it wont mount on modern computers. I might have an idea, but the computer I originally created the SD card on is currently out of commission making it a bit more tricky to have another go. I wasn’t initially aware of the problem because it worked fine on my Linux computer. When it is fixed, or if you are able to use it, note that any files will need to be in an appropriate format to avoid the loss of the resource fork! Anything downloaded from the internet should already be like this but it is more critical when moving things back in the other direction.