Creating a Custom Bootable Classic Mac OS CD from Linux
and possibly other operating systems, which I don’t have to hand
The following is a description of the process to easily create a HFS formatted disk image and burn it to a CD, suitable for use in a Macintosh computer running Mac OS 9.2.2 or older, assuming it has an operable CD drive. If your CD drive is struggling to read disks, cleaning its lens can help. I have some short instructions on how to do that here.
The instructions on actually generating an appropriately formatted ISO disk image ready to be burnt to a CD are universal, and apply equally to Linux, modern Mac OS and Windows, but these instructions provide Linux specific detail as it is the only OS I have on hand to test.
What You Will Need
Hardware
- A computer running Linux (or another OS, but most of my guidance wont be directly applicable)
- An optical drive capable of burning CDs
- A blank CD-R
- A vintage Macintosh running a version of the classic Mac OS, with a functional CD drive.
Software
- A flavour of Linux, this page assumes a Debian family variant, such as Debian, Ubuntu, Mint or Pop!_OS (other operating systems can be used, but detailed instructions are not provided)
- Basilisk II – a cross-platform Macintosh Emulator, a bootable disk image with required software (provided below)
- A ROM image for the emulator, taken from a retro Macintosh you own, or at least equivalent to a machine you own.
- K3b – CD burning software for Linux (other software may work, but detailed instructions are not provided))
Setting Up the Software
Installation
To install Basilisk II, run the command in a terminal…
sudo apt install basilisk2To install K3b, run the command in a terminal…
sudo apt install k3bDownload this disk image which will be your main boot disk for the Basilisk II emulator, extract the contents from the ZIP and store it in a convenient location.
Obtain the required Macintosh ROM, from a Macintosh II series or Centris / Quadra ideally, but other ROMs are likely to work. I have been using a IIci ROM. Store it in a convenient location.
First Run of Basilisk II
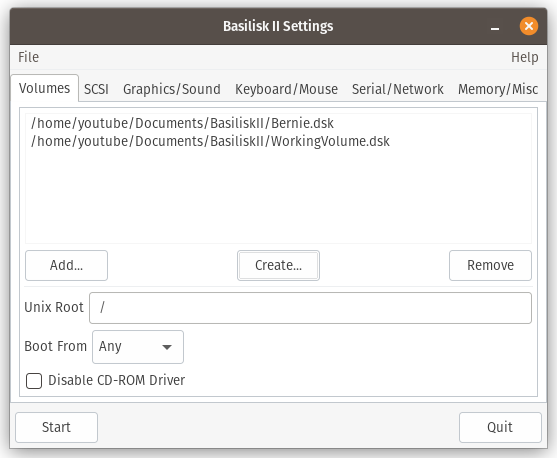
After launching Basilisk II, you will be faced with the window shown above, without the two disks listed. To add these, first, click the “Add…” button, navigate to where you stored the disk image “Bernie.dsk” and select it. This already contains an operating system and the retro Mac software we’ll need to create a bootable CD. “WorkingVolume.dsk” is a second, empty, disk image that we will create now and which will be where we will collate and organise the CD we want to build. Click the “Create…” button and enter the following details for Size and the file name. Navigate to a convenient location to save, and then click “OK”. We now have a 650MB empty disk image in addition to our 1GB, bootable, disk image.

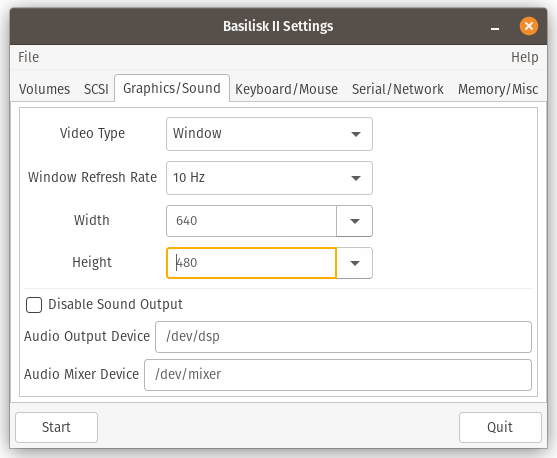
Within the “Graphics/Sound” tab I set the Width and Height to 640 and 480 respectively. These values suit me, but are not critical – for example you could set 1024 and 768 if you wanted a larger emulated display. Sound settings can be left at your installation’s defaults. In the “Memory/Misc” I set MacOS RAM Size to 32MB, Mac Model ID to Mac IIci, CPU Type to 68030 with FPU and selected a IIci ROM file using the “Browse…” button. With my setup, it was required that I selected “68030 with FPU” and not just “68030”, otherwise the emulated computer would not boot from my particular operating system.
03 Graphics / Sound 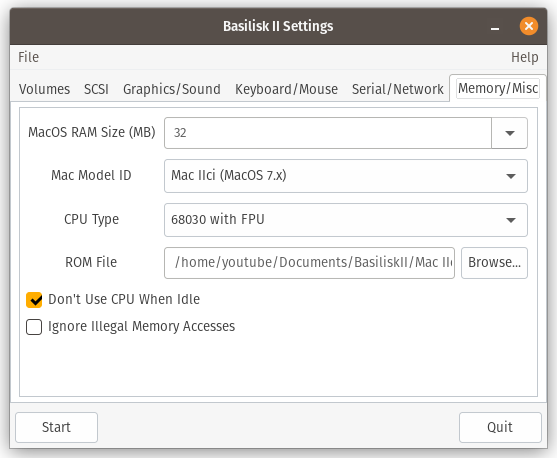
04 Memory / Misc
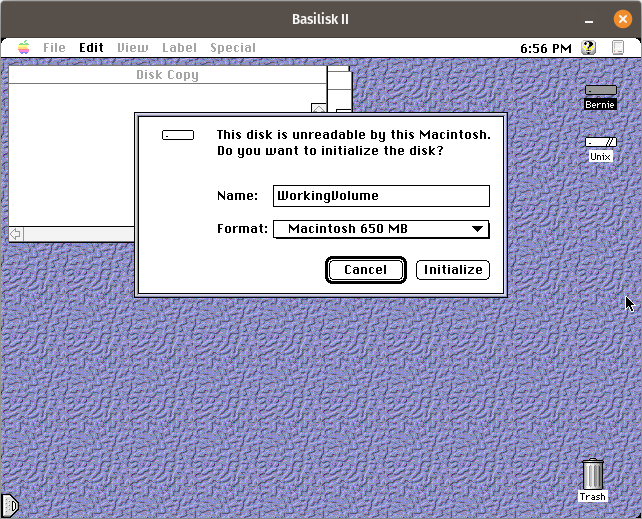
Once you are happy, you can click the “Start” button, and you should be greeted with an emulated Macintosh booting very quickly. Once the startup sequence has completed, the first time only, you will be greeted by a dialogue box asking for you to format the empty “WorkingVolume”, 650MB disk image that you created. Name this disk whatever you want your CD to be called when it mounts on the desktop (after this first time, you will need to do this by renaming the volume on the desktop). Keep the format as the default “Macintosh 650 MB”. Click “Initialize”.
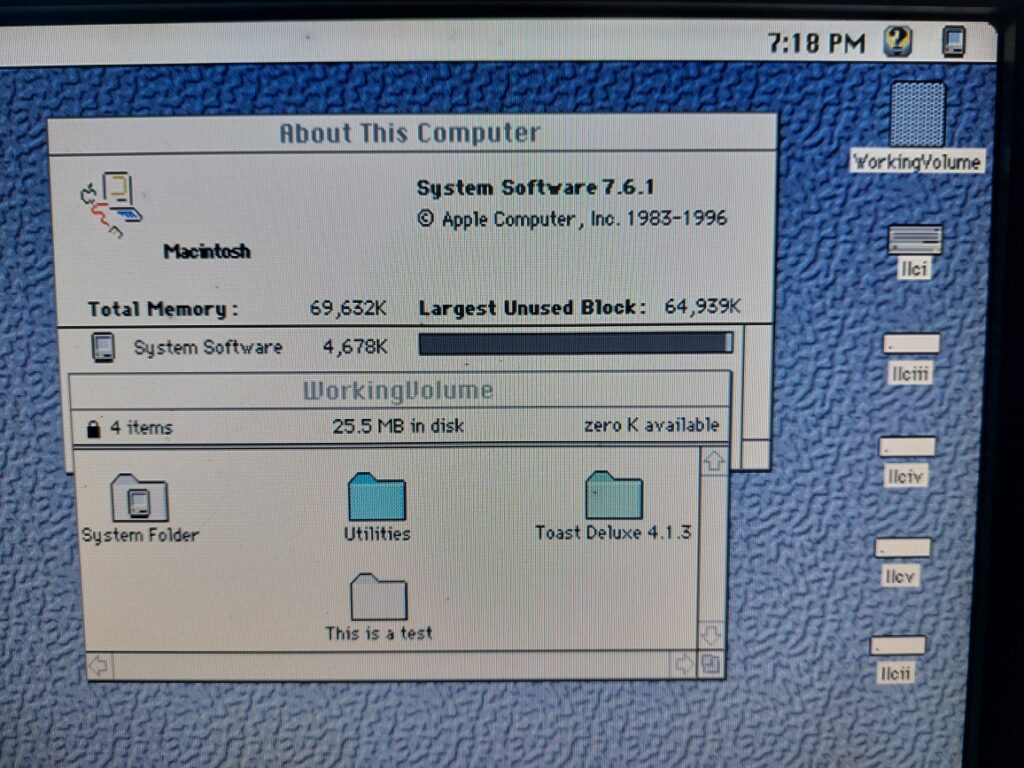
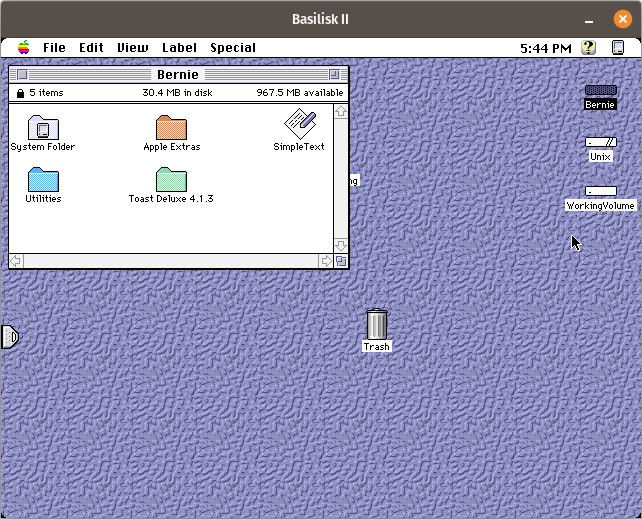
The new volume, in my instance called “WorkingVolume” will mount on the emulated desktop, along with “Bernie”, our boot volume and “Unix”. Unix is a link into the host computer’s file system which we will be using later to transfer our complete disk image back to the host for burning to a disk. Your window should look similar to the following.
Congratulations! You are now ready to start creating your custom bootable CD!
Creating Your Bootable CD
Use the emulator to fetch the various files you want to put on the CD. If you are on a computer that doesn’t natively support resource forks, such as Linux or a Windows PC, it is best to move any files onto the emulator in a protective container format such as a .bin file, later versions of .sit (SIT5) or some disk image formats. Some disk images can be “added” to the emulator as other emulated hard disks in the same way we added the “Bernie” disk above. Care must be taken as classic Mac OS files contain both a data and a resource fork. The resource fork is not usually recognised by other computer platforms and they are prone to “strip” the resource fork from a file. Doing so severely corrupts most Mac OS files, for example, 68k applications have all of their executable code in the resource fork and removing it… removes the application’s ability to do anything at all, irreparably. Assuming the files you are working with were correctly prepared in the first place (this is sadly more frequently an issue than it should be), extracting the archives / encoded files from within classic Mac OS itself is usually the best, although not only, solution.
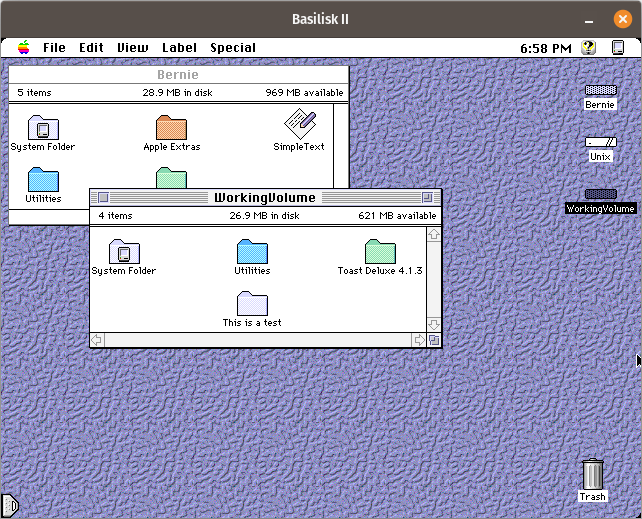
Personally, I store files I want to transfer to the emulator in a specific folder on my hard disk, then use the “Unix” volume within the emulator to copy them over to the volume “Bernie”. Here, I extract them (the tools provided within “Utilities” should help in many cases) and then copy the files onto “WorkingVolume”, and arrange them as I want. Note that the window arrangement you leave the windows in will be burned forever into the CD, so it is usually good to move windows up to the top left corner to ensure that they are easily accessible even on a computer with a small screen. In the following example, I have copied a number of items from the “Bernie” disk over to “WorkingVolume”. This includes the System Folder, as this will be the bootable operating system on my CD. This System Folder is a good starting point for bootable disks as it is a universal “minimal install for any computer”, although older computers, such as non-32 bit machines like the SE/30, are not compatible with Mac OS 7.6.1 by default.
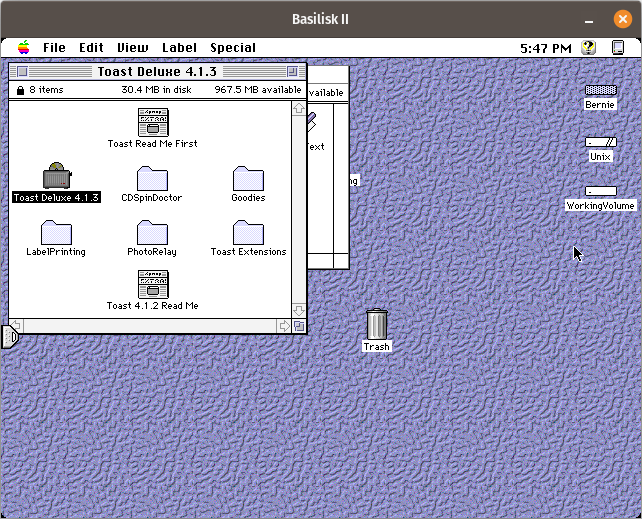
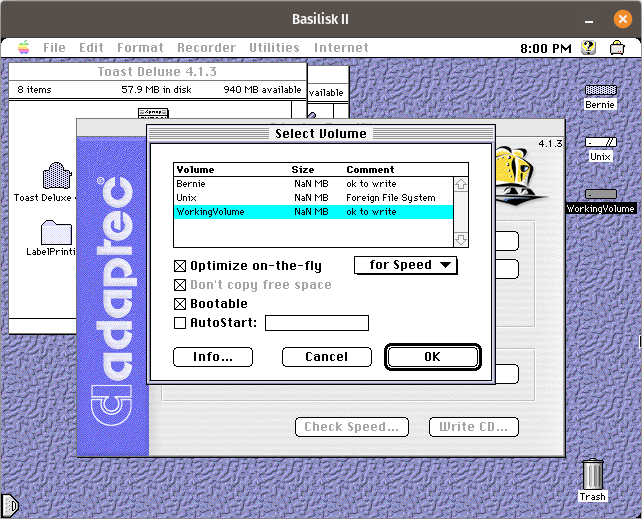
Once you are happy with the contents, icon layout, window positioning and have verified that everything you have placed on the disk works as expected, you are ready to start creating a CD disk image. To do this, open the “Toast Deluxe 4.1.3” folder on the Bernie disk. Then launch the application “Toast Deluxe 4.1.3”. You should see a window similar to the one shown in the second image immediately below. Select “Mac Volume” from the drop down menu, and then drag the “WorkingVolume” disk icon (or whatever you have called your working volume) into the area under the drop down menu. The window should update to similar to the provided image, with the name of your volume following the bold text says “Data: “. Note that Toast will use the CD ROM or CD DVD ROM Extension from the booted Operating System as the CD Driver on the CD it writes, so it needs to be made certain that a version is used which is compatible with the computer you plan to boot. In some cases it might be best to create the custom disk image on the actual machine itself if possible.
08 Toast Folder 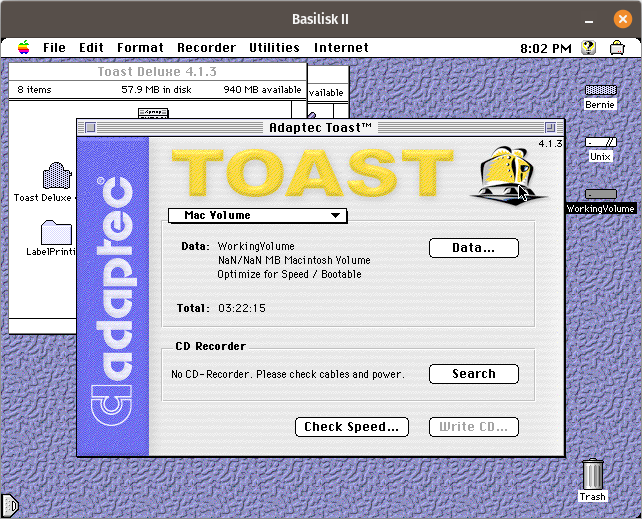
09 Mac Volume
Click the button “Data…” and verify that the “Bootable” checkbox is checked if you intend to create a bootable disk. If you do not intend your disk to be bootable, you do not need to do this step. Click “OK” to close this dialogue box again.
As per the following two images, select “Save as Disc Image…” from the “File” menu, and enter a name for your disk image. Note that you will want to finish the file name with “.iso” – this is important for other operating systems, such as windows, but also serves as a reminder when you are managing your files. You can either save the file on “Bernie” if there is 650MB free, or alternatively save directly to the host by navigating to a suitable location on the mounted “Unix” volume.
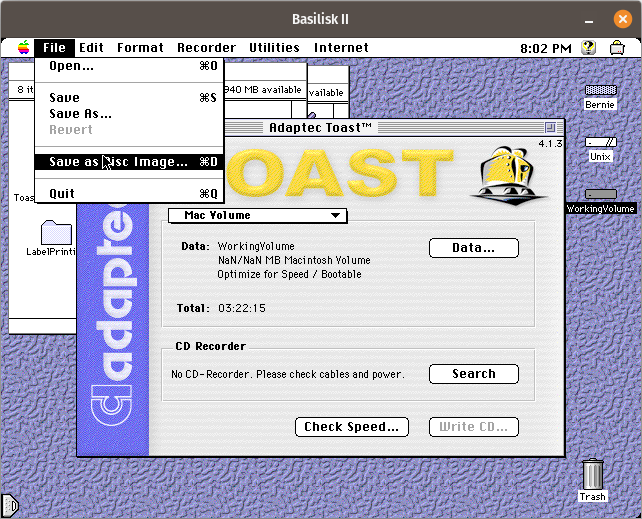
11 Save as Disk Image 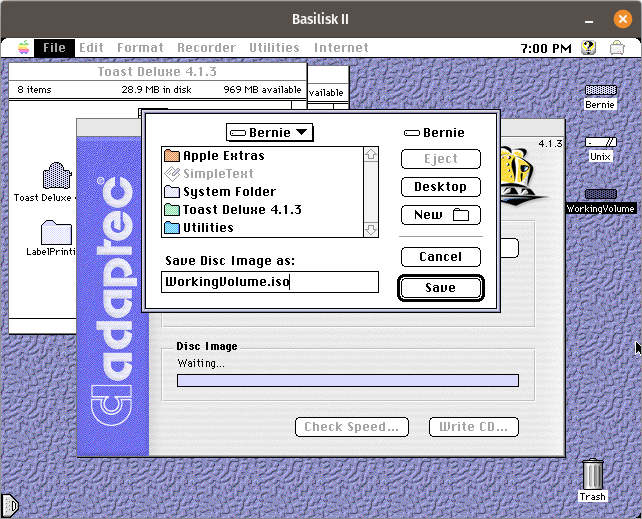
12 Save Disk ISO
Congratulations! You now have a disk image, hopefully formatted correctly to boot a classic Macintosh computer!
Burning the Disk Image
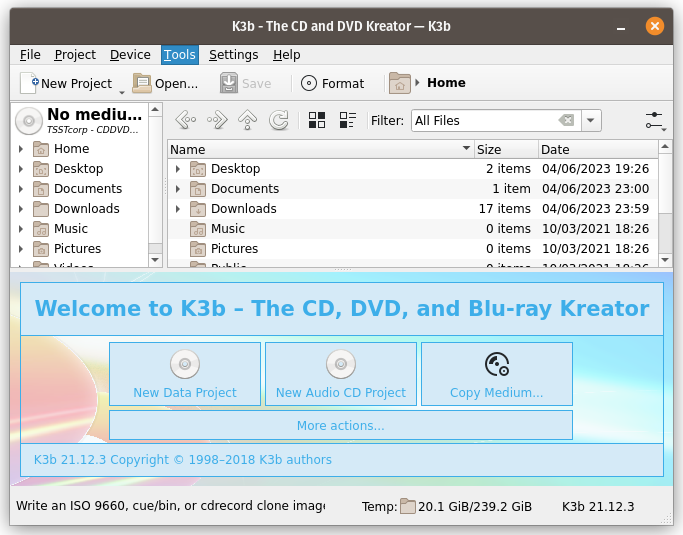
On Linux, launch K3b (which you installed at the beginning of these instructions) and select “Burn Image…” from the “Tools” menu. Near the top of the window under the text “Image to Burn”, to the right of the combo box, is a small button with a folder icon. Click this to use a file open dialogue box to select the CD disk image, in my case “WorkingVolume.iso”, which you intend to burn to a CD. When you select the disk image, you will get an error dialogue box as shown below in the second of the three images – Click “Yes”. This dialogue box is generated because the software doesn’t recognise the format of the disk image, because it is a classic Mac OS disk.
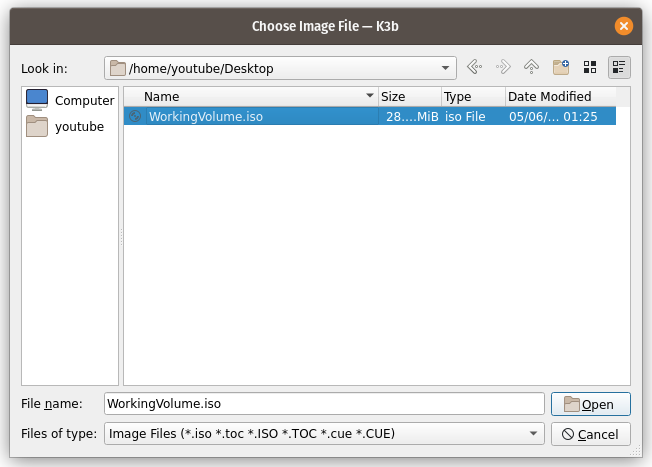
02 Select Working Volume ISO to Burn 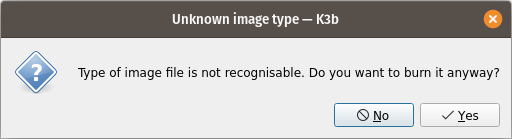
03 Are You Sure Not Recognisable 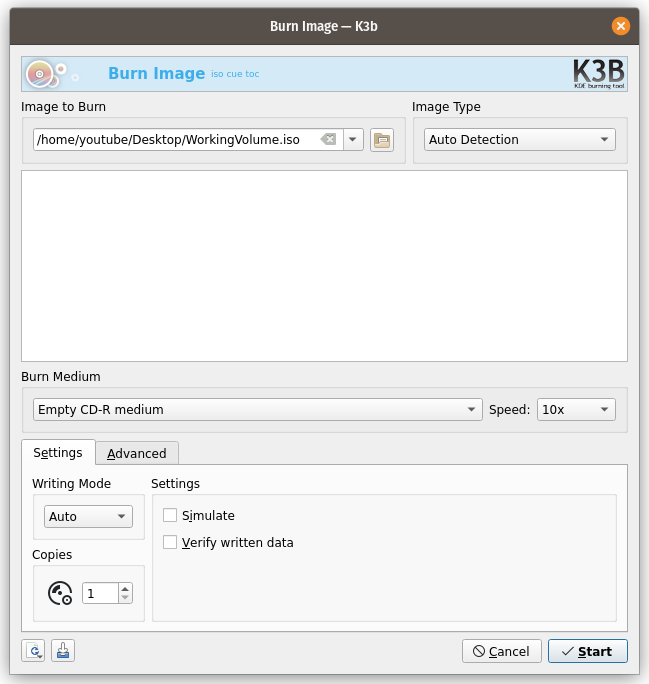
04 Ready To Burn
At this point, it is probably a good idea to insert a blank CD-R into your optical drive if you haven’t already. Once the computer has finished probing the disk and the window updates, in the “Burn Image – K3b” window, set “Speed” to the lowest speed offered and click “Start”.
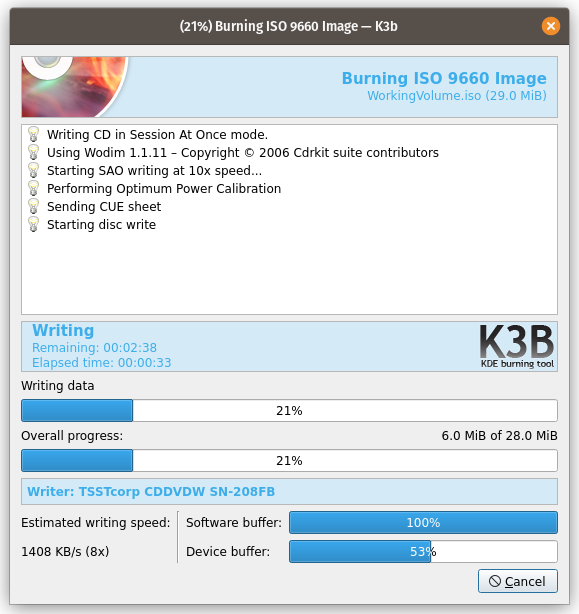
05 Burning 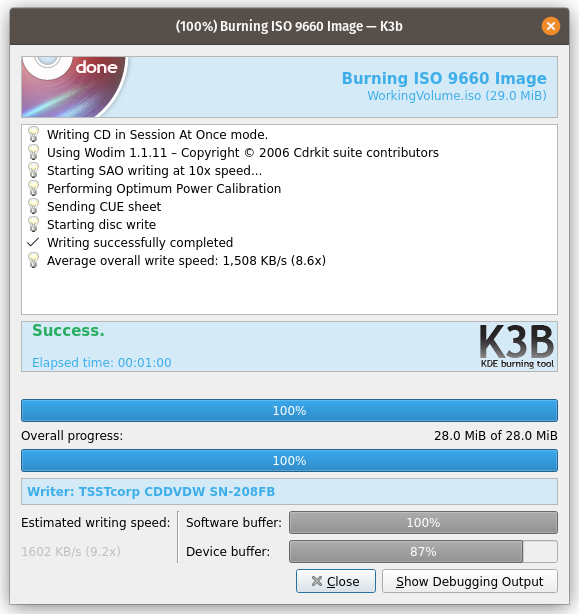
06 Burn Complete