Installing Mac OS 9 on an 800Mhz iBook G4
When Apple released the first iBook G4, they decided to terminate support for Mac OS 9, requiring users to run 10.3 or 10.4. This is a shame, as personally, I feel a 12″ iBook G4 is an excellent machine for running retro software. This said, there are a number of ways around this difficulty. The following is a record of how I did it.
I’ve seen other instructions which are more complex, noting that there are a number of variants of the G4 iBook. The following instructions are confirmed working specifically on the 12″, 800MHz iBook G4, but may work on other variants of the G4 iBook. Note that the last of the G4 iBooks have a different graphics chipset, which isn’t able to be accelerated within Mac OS 9.
My method made use of another, older, Macintosh, which supported booting Mac OS natively. I used this to format the iBook’s hard disk and include the Mac OS 9 driver, as the option was suppressed when booting the iBook from 10.3 and 10.4. For the remainder of this post, this machine will be referred to as the “other Macintosh”
WARNINGS
This process requires you to format your hard disk. If you have files you want to save, it is recommended that you do a complete backup before starting the process.
These instructions assume you have access to the other Macintosh.
Mac OS 9 is unsupported by Apple on this machine. There are a number of things that wont work. This potentially includes, and may not be limited to… LCD backlight brightness, the AirPort card, USB 2 (ports work as USB 1.1).
It has been noticed that sometimes the computer glitches when it boots and the mouse wont work. This is the same with OS 9 hacked Mac Minis. Usually the machine behaves following a forced restart.
By default, the mac will run at a lower, energy saving, clock speed. Mine defaulted to 450MHz. I left it like this because that is more than enough for almost any classic software I want to run. It is possible to bump this to the full 800MHz by entering the correct commands in Open Firmware, but that isn’t covered here.
Mac OS 9 does not appear in the Startup Disk Control Panel in Mac OS X on these machines.
There are other guides elsewhere on the internet that attempt to fix some of these issues, or allow you to undertake the process without the other Macintosh. The method described here is intended to be fairly basic and easy to follow, with the single complexity of requiring the other Macintosh
Required Hardware
- An 800MHz 12″ iBook G4
- A FireWire cable
- A Macintosh with a FireWire port that is able to natively boot Mac OS 9.x or older
Getting the Needed Files
Download the following, and move them to the other Macintosh. The first link would be best burnt to a CD, otherwise software for mounting an iso disk image, such as Toast or Virtual CD/DVD-ROM Utility, can be used.
- http://macos9lives.com/smforum/index.php?topic=2143.0
- https://elephantandchicken.co.uk/downloads/iBookOS9/ATYVia_9200M9.sit
Preparing the Hard Disk
I spent quite a while faffing trying to follow instructions on correctly formatting the hard disk that I had found elsewhere. They didn’t work because the author assumed that the iBook was able to format its own disk including the Mac OS 9 Disk Driver, which it isn’t. The solution that worked for me was to connect the FireWire port of the iBook with the FireWire port on another, older Macintosh which supports booting from Mac OS 9 and formatting using that machine and FireWire Target Disk Mode. There are more complex methods detailed elsewhere, designed to trick the iBook into booting from a CD. I’ve not covered those because the following is quicker for me and doesn’t require messing with Open Firmware.
- Connect a FireWire cable between ports on the iBook and the other Macintosh.
- Power on the iBook G4 you plan to reformat while holding down the ‘t’ key on the keyboard. The iBook should display a FireWire logo on the screen.
- Power on the other Macintosh, in either Classic Mac OS or Mac OS X.
- The iBook should mount as an external hard disk in Mac OS X. It likely wont appear on the desktop in Mac OS 9.2.2 or older, but that is probably OK.
- I recommend creating two partitions (although this isn’t a requirement – you can use a single partition as long as your disk isn’t too large for OS 9), making the first one small (at least 2GB, no more than 180GB (there is an approximately 190GB limit)). In Mac OS X, use Disk Utility to select the iBook hard disk and format the hard disk using the “Partition” tab, making sure you select the “Install Mac OS 9 Disk Drivers” checkbox. Alternatively, in classic Mac OS, use the Utility “Drive Setup” to do the same, the Mac OS9 driver will be installed automatically using Drive Setup.
- Don’t power down either machine as the next section continues from this scenario.
Installing Mac OS 9.2.2
- Mount the “Mac OS 9.22 Unsupported G4.iso” CD or disk image on the other Macintosh
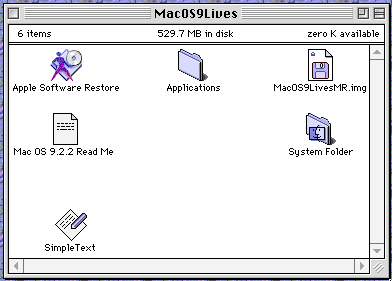
- On this disk, launch the “Apple Software Restore” application and restore the software to the prepared Mac OS 9 iBook partition
- Once the restoration has completed, extract the ATYVia_9200M9.sit archive (which you downloaded and transferred independently of the CD image).
- Drag all of the contents of the archive onto the iBook Mac OS 9 partition’s Extensions folder – it will ask if you want to replace some existing files, you do want to replace existing files.
- If there is a folder called “Multiprocessing” in the Extensions folder, delete it.
- Power down the “other” Macintosh and then the iBook and disconnect the FireWire cable.
Booting Mac OS 9.2.2 for the First Time on the iBook G4
Power on the iBook G4 while holding down Cmd+Opt+P+R. This will clear the PRAM and set the computer to default settings. Success will be indicated by a second chime as the iBook restarts itself – you can release the keys after hearing the second chime.
At this point, the computer will probably boot into Mac OS 9.2.2, but if it doesn’t, restart and hold down the option key while starting. This should present you with a boot selection screen. It takes an age to finish loading because it searches for any available local and network operating systems. Once it does finish searching, the cursor will change from a watch to a pointer. Select the Mac OS 9 disk and click the arrow to continue booting.
Congratulations, you have a G4 iBook that boots the Classic Mac OS, and has accelerated 2D and 3D graphics.
Installing Mac OS X
You can install Mac OS X (probably 10.3.x or 10.4.x depending on preference) if you want to. Whatever you do, don’t erase the hard disk or you’ll lose your good work. I’d install Mac OS 10.4 on the second large partition that I prepared when I formatted the iBook’s hard disk.
Note that the Mac OS X “Startup Disk” Control Panel wont show Mac OS 9 as an option. This can be solved by powering on while holding the option key to get the boot selection screen, installing “XPostFacto” and using it as an alternative to Startup Disk, or by doing some terminal hacks that can be found elsewhere on the internet and which make Startup Disk work correctly. I just use the first two options and haven’t investigated the third.
The Mac OS 9 Startup Disk Control Panel works as normal and you can select between Mac OS 9 or Mac OS X there.
Special Thanks
Huge thanks to the folks at MacOS9Lives for all their amazing work getting Mac OS 9 working on various unsupported computers. This post is basically just instructions on how I used their hard work. All credit for this being possible goes to them. Please visit the following thread for more information : http://macos9lives.com/smforum/index.php?topic=2143.0
Author Notes – Things I need to update this page with…
- You should make a little Open Firmware patcher to automatically set the processor to 450MHz / 800MHz
- You should modify the installer disk image to include the correct graphics drivers and remove the Multiprocessing folder